

Introduction
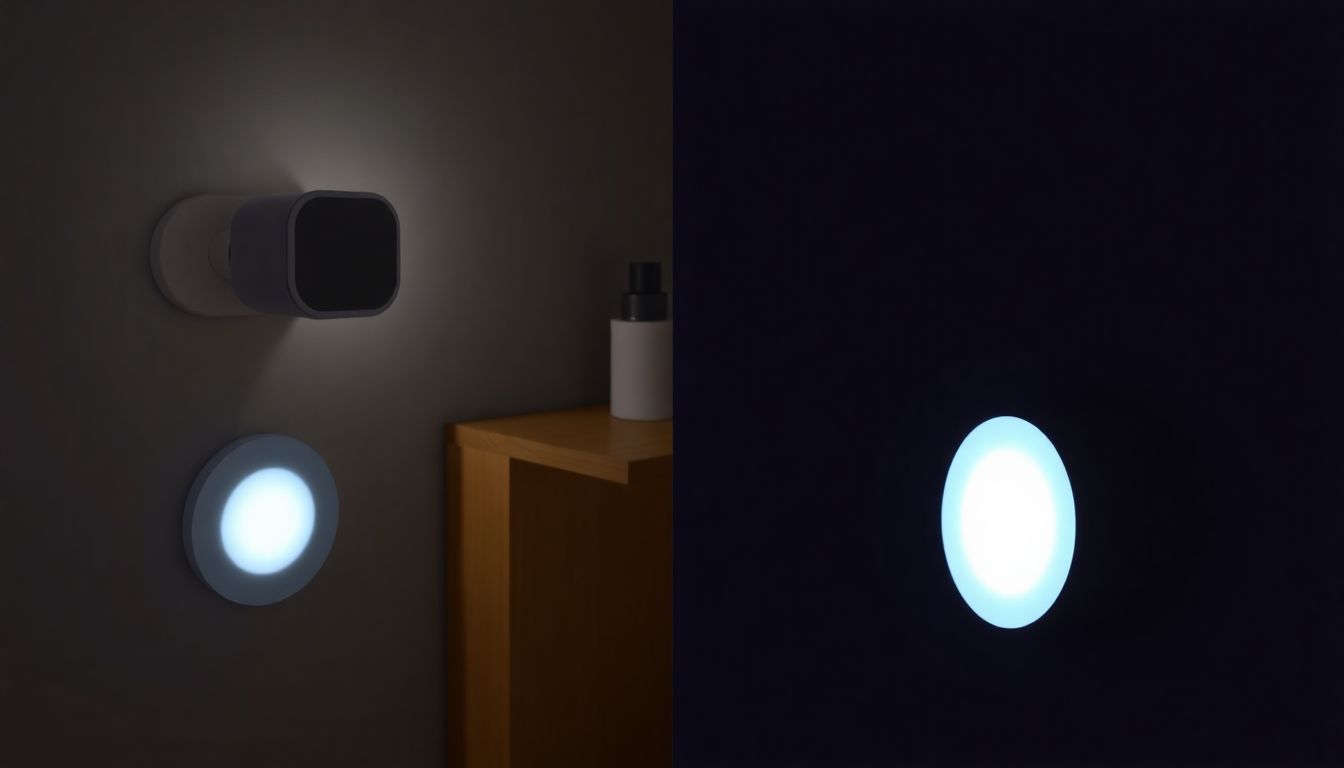
Nightwise lighting using rechargeable smart night lights is one of the highest-impact, lowest-effort upgrades you can make for home safety and energy efficiency in 2025. These compact devices combine motion sensing, low-power LEDs, and rechargeable batteries to create on-demand illumination along critical night-time paths. This expanded guide walks through everything from the technical options and purchasing checklist, to detailed installation plans, advanced automations, performance calculations, and maintenance strategies so you can configure personalized motion zones for fall prevention and energy savings.
What You Will Learn in This Guide
- The core technologies and specifications to compare when buying rechargeable smart night lights
- Exact placement and configuration recommendations for bedrooms, stairs, bathrooms, hallways, kitchens, and more
- How to design personalized motion zones to avoid false triggers and ensure safety
- Advanced smart home automations with example configurations for popular platforms
- Energy and cost calculations to estimate savings and ROI
- Maintenance, battery care, privacy, and troubleshooting best practices
Why Rechargeable Smart Night Lights Are Worth It
- Lower energy use by lighting only when motion is detected rather than running 24/7
- Reduced fall risk by providing targeted illumination at key times and locations
- Flexible placement without needing wiring, making them ideal for renters and quick installs
- Improved user experience through warm, low-glare lighting that protects sleep cycles
- Smart integrations enable context-aware behavior and remote control
Deep Dive: Key Technologies and Specifications
Understand these elements when selecting devices so your purchase meets safety, longevity, and smart home needs.
Motion Sensor Types
- Passive infrared sensor, PIR: Detects heat and motion. Good for human detection, low power consumption, widespread use. Sensitive to placement and can be blocked by glass.
- Microwave sensor: Emits microwaves and measures reflection changes. Works through some non-metal barriers and has longer range, but consumes more power and can over-trigger.
- Dual-technology sensors: Combine PIR and microwave or PIR and ultrasonic to reduce false positives. Useful in challenging environments.
Optics and Coverage
- Fresnel lenses concentrate IR for PIR sensors and create the characteristic detection zones. Wider lenses give broader coverage; narrower lenses focus on corridors and stair runs.
- Vertical and horizontal detection angles determine where you should mount. Look for explicit angle specs in product pages.
LED Performance
- Lumens: How bright the light is. For night path lighting, 10 to 200 lumens is typical depending on role. Stairs may require 50 to 150 lumens for safety.
- Color temperature: Warm white 2700K to 3000K reduces blue light and sleep disruption. Cooler temps are more alerting, not recommended for nighttime use near bedrooms.
- Color rendering index, CRI: 80+ is adequate for general home navigation; higher CRI improves color perception for tasks.
Battery Technology and Charging
- Lithium-ion rechargeable batteries are common, providing higher energy density and lighter weight than NiMH.
- Battery capacity appears as mAh and voltage; estimate operating hours by dividing usable watt-hours by LED power draw.
- Look for USB-C charging, in-device solar charging options if applicable, or swappable battery designs for long-term maintenance.
- Charging cycles: quality lithium packs often sustain 500 to 1000 cycles with acceptable capacity retention.
Connectivity and Smart Integrations
- Bluetooth: Low-power, good for local app control but limited range and multi-device coordination.
- Wi-Fi: Direct cloud connectivity allows remote control and OTA updates but uses more power during active communications.
- Zigbee/Z-Wave: Low-power mesh protocols that integrate well with local home automation hubs like SmartThings or home bridges.
- HomeKit and Matter: For those invested in Apple ecosystems, HomeKit and Matter compatibility deliver secure, local, and standardized integrations.
Designing Personalized Motion Zones
Motion zones are the core idea of Nightwise lighting. A motion zone is a defined area where motion will trigger a light or set of lights. Effective design reduces false triggers, ensures consistent illumination, and prevents wasted battery and energy.
Step 1. Map Nighttime Routes and Risk Areas
- List every path used at night: bedroom to bathroom, stairs, kitchen to fridge, bedside to living room.
- Mark high-risk spots: stairs, step-downs, uneven thresholds, areas with clutter.
Step 2. Choose Coverage Strategy
- Overlapping short-range zones: several lights with focused coverage to reduce catching irrelevant motion (e.g., pets at the far end).
- Long single-zone coverage: one sensor for a long area, easier to manage but risk of false triggers from distant movement.
- Directional placement: orient lights to place the brightest illumination on the walking surface rather than walls to maximize visual guidance.
Step 3. Choose Mounting Height and Angle
- 3 to 5 feet above the walking surface often gives optimal PIR detection for adults; lower for toddlers or wheelchair users.
- For stairs, mount sensors at the top and bottom, angled parallel to the steps to detect foot movement along the plane of motion.
Step 4. Set Sensitivity, Range, Timeout, and Ambient Threshold
- Sensitivity: Increase for frail or slow-moving occupants; decrease to avoid pets and HVAC triggers.
- Range: Reduce in corridors to avoid end-to-end activation; extend for long hallways where one light should cover the entire route.
- Timeout: 15 to 90 seconds depending on the zone. Stairs and longer routes generally need longer timeouts.
- Ambient threshold: Set lux level so the lights only activate under low-light conditions. This avoids pointless activations during evening parties or daytime use when other lights are on.
Placement and Configuration Examples in Detail
Below are detailed, actionable setups for common home types and scenarios. Use these as templates you can adapt.
Bedroom and Bedside
- Placement: bedside on nightstand or low wall sconce 2 to 3 feet above floor facing the bedroom door and path to bathroom.
- Sensor: medium-high sensitivity. Use pet immunity if the pet sleeps on the bed and should not trigger the light.
- Brightness: 5 to 25 lumens for gentle guidance; up to 50 lumens if the occupant has low vision. Color temperature: 2700K.
- Timeout: 20 to 45 seconds. Optionally link to motion sensors in the bathroom so the bedside light turns off when bathroom motion is detected.
Stairs
- Placement: one light at the top and one at the bottom, mounted 3 to 4 feet from the stair surface, faced along the stair flight.
- Sensor: high sensitivity and slightly longer timeout, 45 to 90 seconds so the user has time to ascend or descend.
- Brightness: 50 to 150 lumens depending on step contrast. Consider multiple small fixtures spaced along the flight to create even illumination and minimize glare.
Hallways and Corridors
- Placement: mid-wall mount or short ceiling drops spaced to eliminate dark gaps; consider overlapping fields of view for consistent coverage.
- Sensitivity and range: set medium range to detect human-scale motion but not pets at doorways.
- Timeout: 30 to 60 seconds. Ambient threshold: higher (dimmer) so daytime interior lighting keeps them off.
Bathroom
- Placement: outside the door or above the vanity but avoid direct spray and humidity exposure. Consider IP-rated devices for damp locations.
- Brightness: 10 to 60 lumens; warm light reduces circadian disruption when returning to bed.
- Timeout: 20 to 45 seconds. For layouts where multiple rooms are nearby, link zones so bathroom light raises to moderate brightness only when required.
Kitchen and Night Fridge Access
- Placement: under-cabinet and countertop fixtures triggered by motion at the entry to the kitchen or near the fridge.
- Brightness: moderate 30 to 100 lumens depending on task. Use warm or neutral white to avoid cold, wakeful lighting late at night.
- Automation: configure fridge access mode that provides short duration bright lighting when the fridge door opens at night, then returns to dim pathway lighting.
Closets, Cabinets, and Under-cabinet Areas
- Placement: inside cabinet doors or tucked under shelves to illuminate contents without the overhead lights.
- Sensitivity and timeout: lower sensitivity and short timeout of 10 to 25 seconds.
Advanced Automations and Integrations
Connecting rechargeable smart night lights into a smart home lets you apply context to lighting decisions. Below are platform-agnostic concepts followed by specific examples for Home Assistant and popular ecosystems.
Contextual Automation Ideas
- Night mode: between set hours (for example 10 PM to 7 AM), motion zones operate at lower brightness and stricter ambient thresholds.
- Presence-aware behavior: if multiple occupants are home, keep corridor lights in motion mode; when house is empty, extend timeouts or set different thresholds.
- Bedtime scene: when primary occupant triggers the bedtime scene, bedside light will ramp to low warm level for a short time and then switch off; hallway lights remain available to detect motion.
- Stair safety macro: if motion is detected at the top of the stairs, both top and bottom stair lights turn on; if additional motion is detected at mid-stair sensors, maintain brightness longer.
- Emergency fallback: link to fall detection or medical alert systems to automatically illuminate the entire route and send notifications if an anomalous event is detected.
Home Assistant Example Automation
Example uses a motion sensor entity and a light entity. Adapt entity names to your installation.
alias: Night Passage - Hallway
description: Turn on hallway night lights when motion detected at night
trigger:
  - platform: state
    entity_id: binary_sensor.hallway_motion
    from: 'off'
    to: 'on'
condition:
  - condition: time
    after: '22:00:00'
    before: '07:00:00'
  - condition: numeric_state
    entity_id: sensor.hallway_illuminance
    below: 40
action:
  - service: light.turn_on
    target:
      entity_id: light.hallway_nightlights
    data:
      brightness_pct: 20
      color_temp: 370
  - wait_for_trigger:
      - platform: state
        entity_id: binary_sensor.hallway_motion
        to: 'off'
        for: '00:00:45'
  - service: light.turn_off
    target:
      entity_id: light.hallway_nightlights
mode: single
This automation triggers only at night and when ambient light is low, sets appropriate brightness and color temperature, and waits for 45 seconds of no motion before switching off.
Alexa and Google Home Suggestions
- Create routines that run on motion detection devices or time schedules to set scenes and adjust brightness.
- Use voice for manual overrides, such as asking for brighter pathway lighting when guests are moving around.
Edge Cases and Special Configurations
- Pet-friendly homes: enable pet immunity or lower sensitivity near pet sleeping areas. Use higher mounting or angled sensors to ignore floor-level motion.
- Wheelchair users: lower sensor heights and expand detection zones for slower, seated movement.
- Shared bedrooms: create presence-conditioned scenes so a partner who wants to sleep in darkness is not disturbed by another occupant moving around.
Energy Savings and Total Cost of Ownership
Quantifying the savings helps justify purchase and deployment.
Example Energy Calculation
- Standard plug-in night light: 2.5 W running 12 hours per night: 2.5 W * 12 h = 30 Wh/day, 10.95 kWh/year.
- Rechargeable smart night light idle usage and duty cycles: assume 0.5 W average plus active bursts. If nightly activity results in 10 minutes of active illumination per night at 3 W, the daily average is 0.5 W baseline + (3 W * 10/60 h) = 0.5 + 0.5 = 1.0 W, or 24 Wh/day, 8.76 kWh/year.
- Relative saving: about 20% in this conservative example. In many real homes with shorter active time or more efficient LEDs, savings exceed 50% compared to always-on plug-ins.
Battery and Replacement Cost Considerations
- Battery packs may need replacement every 2 to 4 years depending on cycles. Factor replacement cost into lifetime TCO.
- Devices with swappable batteries reduce service downtime and extend useful life.
Buying Checklist
Use this checklist at the store or when comparing models online.
- Sensor type and configurable sensitivity
- Battery chemistry, capacity, and replaceability
- Charging method: USB-C recommended
- Brightness range and color temperature options
- IP rating for bathrooms or damp locations
- Connectivity: local integration options like Zigbee, Matter, or HomeKit vs cloud-only
- Firmware update policy and manufacturer support
- Mounting options: screws, adhesive, magnetic, or hang hooks
Extended Case Studies
Two real-world scenarios illustrate how Nightwise setups produce measurable benefits.
Case Study 1. Multi-generation Family Home
Scenario: a three-bedroom home with a grandparent on the main floor and two kids upstairs. Concerns include night-time falls for grandparent and small children bumping into furniture.
- Installed bedside lights for the grandparent, stair lights at both flights, and motion-triggered under-cabinet lights in the kitchen for after-hours snack runs.
- Configured geofencing so night mode only applies when the grandparent's phone indicates they are home to reduce unnecessary triggers.
- Result: family reported fewer late-night disorientations, improved confidence walking at night, and a 30% reduction in plug-in night light consumption across the home.
Case Study 2. Small Apartment with Sleep-sensitive Roommate
Scenario: roommate sensitive to blue light and bright interruptions at night.
- Installed warm, low-lumen bedside and hallway night lights with motion zones restricted to the path from bed to bathroom and the corridor.
- Set automations to dim quickly after motion stops and prevented lights from triggering near the sleeping roommate's head by adjusting detection arcs.
- Result: minimal sleep disturbance and no complaints of wakefulness while maintaining safe navigation.
Maintenance, Battery Care, and Longevity
- Charge regularly and avoid deep full discharges whenever possible for lithium batteries to maximize cycle life.
- Keep devices and sensors clean. Dust and cobwebs reduce sensor sensitivity and degrade detection.
- Check for firmware updates and apply them, especially for connectivity or battery optimization fixes.
- Label and document replacement dates and expected battery lifetime if you deploy many devices across a property.
Privacy, Security, and Safety Considerations
- PIR-based night lights do not record images or audio. Confirm whether your chosen device includes cameras if privacy is a concern.
- For cloud-connected devices, use strong, unique passwords and enable two-factor authentication where available.
- Place devices away from windows when possible to avoid motion triggers from outdoor movement.
- Verify IP ratings before installing in humid or wet areas like bathrooms and outdoor covered walkways.
Troubleshooting Expanded
- Device does not turn on at night: verify ambient light sensor threshold, check battery charge, confirm schedules and automations are set correctly.
- Excessive false triggers: lower sensitivity, change mounting angle, or introduce secondary condition such as lux threshold or another sensor for confirmation.
- Poor battery life: reduce brightness, shrink timeout, update firmware, and verify battery health via app diagnostics if supported.
- Connectivity problems: move the device closer to hub, use a dedicated Zigbee/Z-Wave repeater, or set up local automations to remove cloud dependency.
Regulatory and Safety Notes
- Follow local electrical codes if modifying hardwired fixtures. Rechargeable battery devices mounted in lieu of hardwired lighting may still need to comply with building regulations for stair illumination in some rental or multi-family buildings.
- Use fire-safe batteries and approved chargers. Avoid third-party chargers with unknown safety certifications.
Implementation Roadmap
- Audit your home and map night-time routes and hazards.
- Purchase one high-quality rechargeable smart night light plus one motion-only battery device as a test pair.
- Install in most critical zone using recommended heights and angles. Iterate sensitivity and timeout over three nights.
- Scale to other zones, grouping lights into scenes and automations gradually.
- Monitor battery health and automation logs for false triggers and adjust thresholds.
Final Checklist
- Do you have warm color temperature and appropriate lumen output for each zone?
- Are sensors placed to detect human movement and ignore irrelevant motion sources?
- Have you set ambient thresholds so lights only operate in low-light conditions?
- Do automations account for occupancy, time of day, and other contextual signals?
- Have you planned for battery maintenance and firmware updates?
Conclusion
Nightwise lighting with rechargeable smart night lights is an effective, affordable, and flexible approach to improving home safety, preventing falls, and reducing energy use. With careful selection, placement, and automation, these devices deliver targeted illumination where it matters most, protect sleep, and reduce the likelihood of night-time accidents. Start small with one or two critical zones, refine sensitivity and timeout settings, and then expand to create a cohesive, low-energy night lighting system that fits your household needs.
Next Steps and Resources
- Choose models that support the integrations you plan to use, favoring local control and open standards when possible.
- Plan a 7-night test period per zone to tune sensitivity, timeout, and ambient thresholds.
- Document your configuration and battery replacement schedule for consistent long-term performance.
If you want, I can provide tailored placement diagrams and a device recommendation list based on your home layout, number of occupants, pets, and smart home platform. Share a floor plan or describe your key night-time routes and I will draft a customized Nightwise lighting plan.

Dejar un comentario
Todos los comentarios se revisan antes de su publicación.
Este sitio está protegido por hCaptcha y se aplican la Política de privacidad de hCaptcha y los Términos del servicio.