

Introduction: why this expanded guide matters
Smart rechargeable night lights are a small but powerful upgrade for modern homes. They add safety, convenience, and energy savings — and when installed and maintained properly they can last years while protecting privacy and battery health. This comprehensive guide goes well beyond basic tips to give homeowners a full playbook for placement, charging routines, firmware management, motion‑zone safety, troubleshooting, purchase criteria, and long‑term maintenance. Whether you are equipping a single bedroom or outfitting an entire multi‑story house, the recommendations below are actionable, security‑minded, and tuned for longevity in 2025 and beyond.
What you’ll gain from following this guide
- Safer night‑time navigation with fewer false activations
- Longer battery life and fewer replacements through better charging habits
- Improved privacy and reduced attack surface via firmware and network best practices
- Cleaner installation and easier maintenance with labeling and schedules
- A buying checklist so you choose devices that support security, updateability, and longevity
Core concepts: durability, security, and ergonomic placement
Three central ideas should guide every decision you make about smart night lights:
- Durability: Choose devices built with proper battery management, safe charging, and weather or impact resistance for their intended location.
- Security: Treat every connected night light as a network endpoint. Firmware updates, network segmentation, and password hygiene are essential.
- Ergonomics: Place lights and configure motion zones so illumination is predictable, gentle, and effective where people need it most.
Comprehensive placement guide: room‑by‑room recommendations
Placement is the single biggest factor for motion reliability and battery savings. Below are detailed recommendations and rationale for each part of the house.
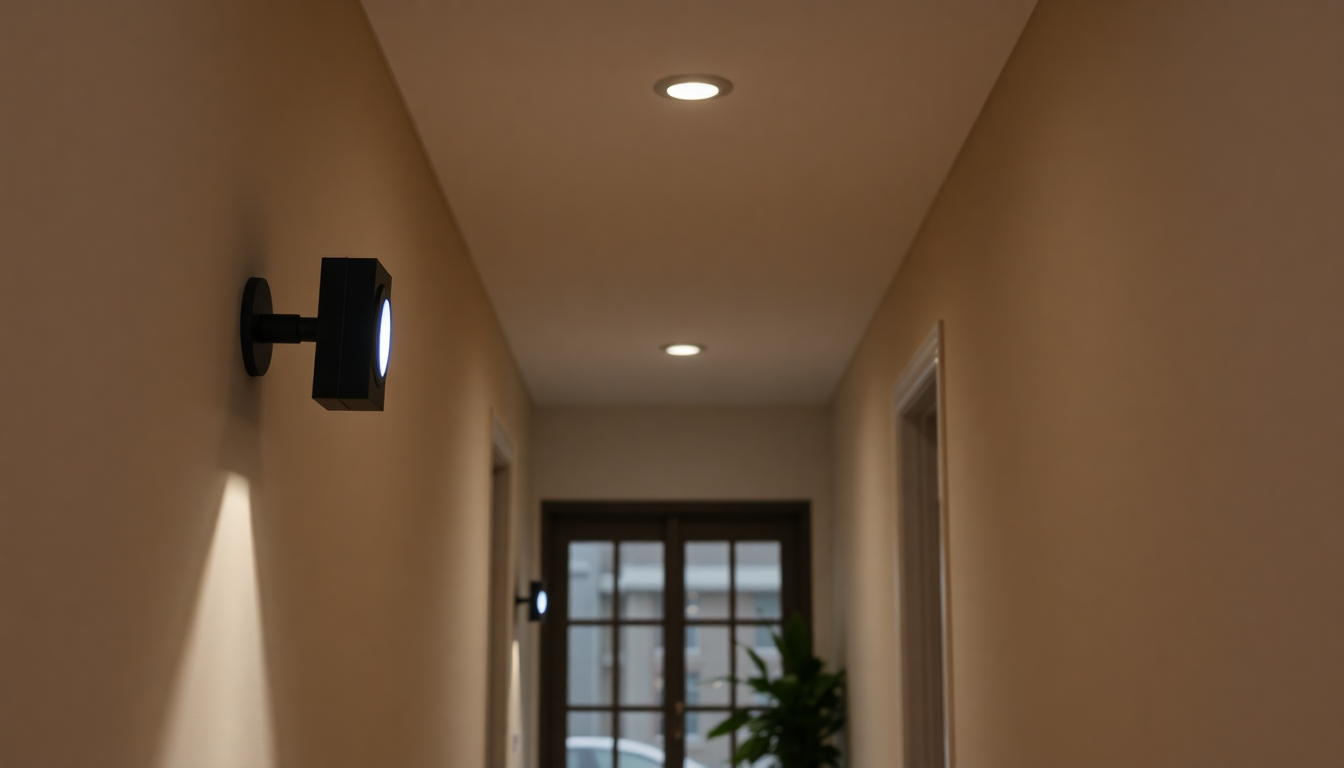
Hallways and corridors
- Height: 3–4 ft above the floor helps sensors detect human movement rather than ceiling heat or drafts.
- Spacing: For continuous path lighting, place units 8–12 ft apart depending on beam spread and lumen output.
- Angle: Aim sensors to detect torso/leg movement; avoid pointing directly at windows that get morning/evening sun.
- Brightness: 20–60 lumens is usually sufficient for a guide path without causing glare.
Staircases
- Mount at each landing and ideally at top/bottom of the run to ensure activation while ascending or descending.
- Avoid mounting directly opposite a step riser where the sensor might miss the approach or be triggered by pets running up/down.
- Consider a slightly higher lumen output for stair areas (40–100 lumens) to reduce trip risk.
Bedrooms and nurseries
- Place out of reach of children and high enough to avoid tampering.
- Use warm color temperatures (2700–3000K) and dim settings (5–30 lumens) to avoid disrupting sleep cycles.
- If the device has child lock settings, enable them to prevent accidental brightness changes.
Bathrooms
- Install near the doorway or vanity zone to give safe visibility on nighttime visits.
- Use moisture‑resistant ratings for devices close to showers or sinks.
- Lower the color temperature and brightness for minimal circadian interference.
Closets, pantries, and cabinets
- Inside the compartment or just outside the door is ideal; shorter range sensors are better to avoid accidental triggers when passing by.
- Prefer fixtures with door/tilt switches for instant activation when opened; these consume almost no standby power compared to always‑on sensors.
Entryways, porches, and exteriors
- Choose fixtures with an appropriate IP rating (IP44 minimum for covered outdoor spots; IP65+ for direct exposure).
- Position to illuminate the approach path, mailbox, and steps rather than facing the street to reduce false triggers from passersby and cars.
- Use motion zones to avoid continuous activation from traffic or tree movement — consider radar for wide area coverage if privacy considerations allow.
Layout examples: design patterns for common homes
Use these sample layouts as templates you can adapt.
- Single‑story home: Place guides at each bedroom door, 12–16 ft spacing in long hallways, stair lights for any steps to exterior, and a porch light covering the door approach.
- Two‑story home: Add landing lights at the top of stairs, motion guides between master and children's bedrooms, and place the main hall units to create a continuous night path.
- Apartment or condo: Inside doorways and hallways, and consider shared hallway rules — avoid overly bright settings that disturb neighbors.
- Split‑level or open plan: Use layered sensing — ceiling units for general coverage and wall units for focused approach areas to avoid dead zones in high ceilings.
Motion sensor technologies and how to choose
Understanding sensor types helps you match device choice and placement to household needs.
- PIR (passive infrared): Detects changes in heat patterns. Best for indoor use. Vulnerable to direct sunlight and large heat sources, but low power and reliable for human detection.
- Microwave/radar: Emits radio waves and detects reflections. Can cover larger spaces and see through some materials, but usually draws more power and can be too sensitive in busy environments.
- ToF (time of flight) and ultrasonic: Measures distance to objects. Good for close range and precision zoning; ultrasonic can be affected by airflow and sound‑absorbing materials.
- Hybrid sensors: Combine PIR with radar or ToF to reduce false positives while maintaining sensitivity for small or slow movements.
- Camera‑based: Provides the richest detection but raises privacy concerns. Avoid cameras in bedrooms, bathrooms, or anywhere private unless you explicitly trust the vendor and local laws permit.
Battery chemistry, battery management, and why it matters
Battery choice and charge management determine lifespan, safety, and total cost of ownership.
- Li‑ion (typical): High energy density, compact, common in modern night lights. Needs proper BMS (battery management system) and CC‑CV charging. Vulnerable to high temps and deep discharge.
- LiFePO4: Lower energy density but greater cycle life and thermal stability. A good choice for devices designed for long service life, although rarer in small night lights due to size constraints.
- NiMH: Less common for high‑integrity smart devices but safer from thermal runaway perspective. They have higher self‑discharge and lower energy density than Li‑ion.
- BMS features to prefer: Overcharge and overdischarge protection, cell balancing, temperature cutoffs, and charge‑rate limiting. Units with good BMS will often last significantly longer and be safer.
Charging fundamentals: best practices for long battery life
- Follow CC‑CV charging if the battery is Li‑ion: A constant current phase up to a voltage threshold, then constant voltage to top off. Avoid using fast chargers that exceed the device's rated input unless manufacturer permits it.
- Avoid deep discharge: Design charging routines so you rarely drop below 20% state of charge. Many devices perform better with shallow cycles.
- Keep charging temperatures moderate: Charge within the manufacturer's recommended window (typically 10–30 °C). High temperatures during charging accelerate capacity loss.
- Use the supplied charger or certified equivalent: Chargers deliver regulated currents and protections tuned for the device. Unregulated or cheap chargers can shorten battery life or create hazards.
- Enable battery optimization features: If the manufacturer provides 'storage mode', 'charge limit', or 'adaptive charging', use them to limit time at 100% and reduce calendar aging.
Practical charging routines and schedules
Routine beats guessing. Here are practical schedules depending on usage patterns.
- Low–moderate use (guidance lights in hallways): Charge every 4–12 weeks depending on runtime; set monthly reminders to check capacity via app diagnostics.
- High‑use areas (stair lights or outdoor approach lights): Check charge every 2–4 weeks and schedule night light firmware checks monthly.
- Seasonal storage: If you remove units for storage, store at ~40–60% charge and check every 3–6 months. Power down the device if possible.
- Always‑plugged devices: If the unit is designed to be left on a dock, prefer devices with charge management that float below 100% or that implement trickle modes to reduce capacity loss.
Firmware updates: process, safety, and rolling strategy
Firmware is where many functional improvements and security patches happen. A poor update habit can mean vulnerabilities or broken features.
Update principles
- Enable automatic OTA updates when the vendor has a trustworthy track record, secure signing, and clear release notes.
- Prefer vendors that sign firmware images with cryptographic signatures and publish hashes to verify downloads.
- Keep a monthly update cadence: check for updates monthly and immediately after known security advisories.
Safe update workflow
- Review release notes in the vendor app or website for security fixes and behavioral changes.
- Back up configuration or note current settings to reapply if needed.
- Apply the update to one non‑critical device first as a canary to catch regressions.
- If the canary passes for 48–72 hours, roll the update to the remaining devices.
- Keep logs of update events and failures to help vendor support if needed.
What to do when updates fail
- Retry over a stable Wi‑Fi connection and during low network load.
- Look for local update tools: some manufacturers offer USB or local LAN tools for recovery.
- Contact vendor support and provide debug logs. If available, perform a controlled factory reset and reattempt updating after re‑adding the device to your network.
Network and device security: reducing attack surface
Treat every smart night light as an IoT endpoint. Use simple, effective network controls to limit risk.
- Segmentation: Put devices on a separate IoT VLAN or guest SSID with client isolation to limit lateral movement from one device to another or to your main network.
- Firewall rules: Restrict outbound connections to only the vendor's servers when feasible and block unnecessary inbound traffic.
- Disable UPnP and remote management if not needed: These protocols can open unexpected ports and bypass NAT protections.
- Change default credentials: Use unique strong passwords or the vendor's recommended passkey approach for each device.
- Use WPA3 or WPA2‑AES with a strong passphrase: Avoid WEP or WPA‑TKIP entirely. If your router supports it, enable WPA3 for future‑proofing.
- Device naming and inventory: Keep an inventory (device model, MAC, firmware version, location) and update it when you add, remove or replace units.
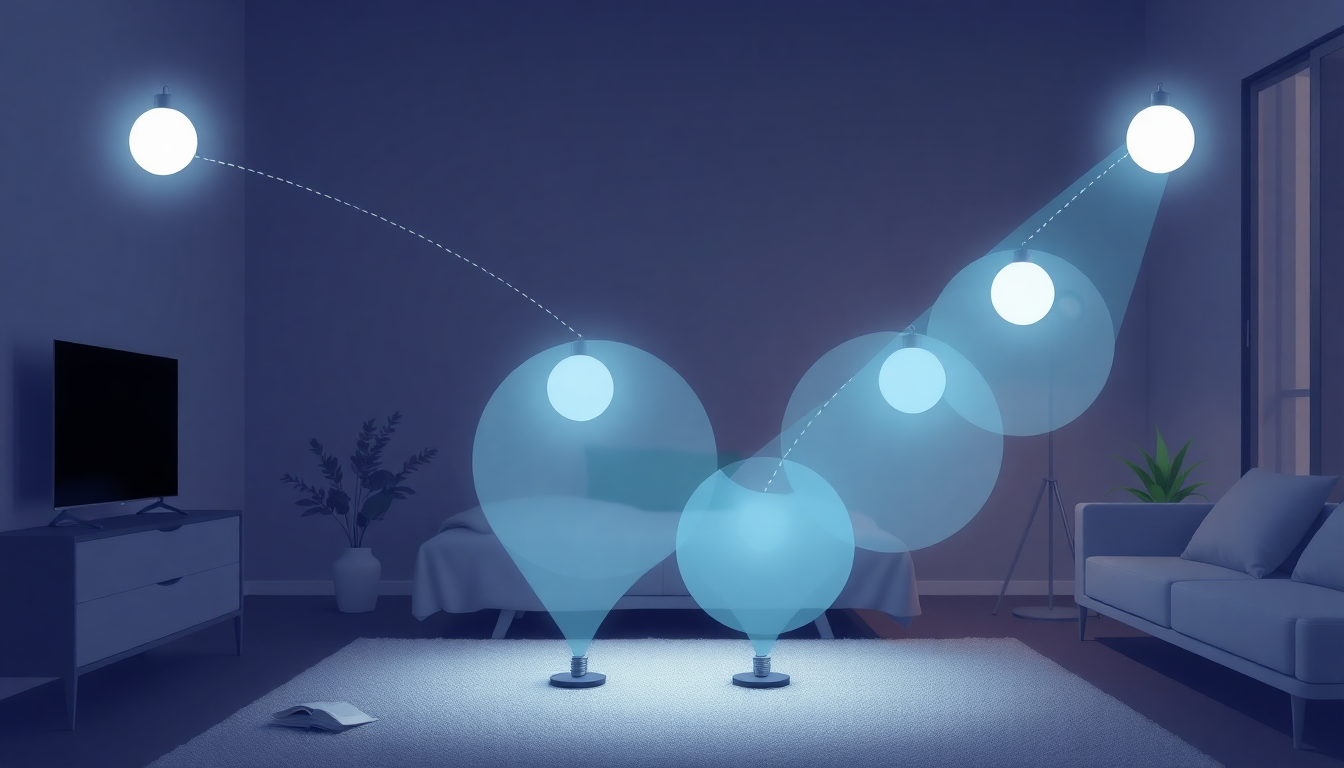
Motion‑zone safety and advanced calibration
Calibrated motion zones reduce false activations, extend battery life, and ensure lights come on when needed without startling occupants.
Creating effective motion zones
- Map paths: Walk the routes you want lit and mark sensor coverage. Avoid zones that include windows, heating vents, or HVAC registers which can cause false positives.
- Overlap strategically: Small overlaps between adjacent sensor fields avoid blind spots but minimize overlap to reduce redundant activations.
- Height and angle: Mount sensors so they read human chest/torso movement. For pets, ensure the sensor axis misses low‑lying movements if you want to avoid pet triggers.
- Time‑of‑day rules: Use schedules to reduce sensitivity or disable motion during daytime hours when incidental triggers are common.
Configuring sensitivity, timeout, and brightness
- Sensitivity: Start at medium and reduce only if false triggers are frequent. Increase slightly in areas where small or slow movements must be detected.
- Timeout (how long the light stays on): Short timeouts (10–30 seconds) are efficient for quick path lighting. Longer timeouts (60–180 seconds) are better where tasks take longer, e.g., bathrooms.
- Brightness profiles: Use gradient or fade features if available to ramp up softly rather than sudden maximum brightness. Consider two‑level activation: lower level for general presence and higher level if sustained motion is detected.
Pet and child considerations
- Enable pet mode if available, or reduce sensitivity and raise the sensor mounting height to avoid activating on pet movement.
- Use child locks and hide physical controls to prevent children from changing settings.
Testing and validation plan
Don’t rely on guesswork. Validate installation with a simple test plan.
- Test activation at multiple times: nighttime and daytime to identify environmental triggers.
- Walk typical paths at normal and slow pace to confirm detection for children or elderly family members.
- Test with pets present to confirm no frequent false positives.
- Monitor battery depletion rate for 1–2 weeks after installation; adjust motion sensitivity or timeout to meet expected runtime goals.
Detailed installation best practices
- Use screws for permanent mounting rather than adhesive strips for devices that are handled frequently.
- Label each device with a small printed tag indicating room, model, MAC address, and purchase date for maintenance reference.
- Ensure ventilation around charging docks to allow heat dissipation; avoid enclosed cabinetry during charging.
- For outdoor units, run conduit or protected wiring if hardwiring is needed, and observe local electrical codes — hire a qualified electrician for mains wiring work.
Maintenance schedule (a simple plan you can follow)
- Daily: Visual check of high‑traffic units for obvious damage.
- Weekly: Quick brightness and motion responsiveness test for stair and entry lights.
- Monthly: Check firmware versions, verify battery health via app diagnostics, and inspect physical mounts.
- Quarterly: Clean sensor windows (wipe dust and film) and perform a canary firmware update test if vendor releases new builds.
- Annually: Review inventory, dispose of or replace units showing significant capacity loss, and confirm network and password hygiene.
Expanded troubleshooting and diagnostics
When things go wrong, the path to resolution is diagnosis + correction. Here are extended checks and corrective actions.
- Frequent false triggers: Check for moving plants, ceiling fans, HVAC vents, reflective surfaces, or sunlight patterns. Reduce sensitivity or reaim sensors. Consider hybrid sensors for better discrimination.
- Battery drains fast: Lower brightness, shorten timeout, check for constant Wi‑Fi activity (keep‑alive pings), and ensure the firmware isn't stuck in diagnostic mode. Try a factory reset and re‑pairing to the network.
- Connectivity drops: Check Wi‑Fi signal strength at the device. Consider a mesh satellite, Wi‑Fi extender, or place a small Wi‑Fi access point in the area. Reserve non‑critical devices for the weaker links and critical stair/entry lights for the strongest coverage.
- Firmware rollback or bricked device: Follow vendor instructions for recovery mode. If the vendor provides local flashing tools, use them; otherwise escalate to support with logs and serial output if available.
- Charging problems: Inspect cables and contacts for corrosion, bent pins, or debris. Measure voltage at the dock (if comfortable) and replace suspect cables with certified replacements. Do not attempt internal battery repair unless qualified — replace with manufacturer replacement cells only.
Buying checklist: what to look for in 2025
Before you buy, verify the following attributes:
- Clear battery chemistry and BMS details: manufacturer should state Li‑ion/LiFePO4/NiMH and list protections.
- Firmware OTA with signed updates and visible release notes.
- Security features: unique device credentials, support for network segmentation, optional local control, minimal cloud telemetry.
- Motion sensor type clearly documented (PIR, radar, hybrid) and expected detection ranges and angles.
- Ingress protection rating for outdoor use and robust mechanical mounting options.
- Vendor reputation and update policy: how long they promise firmware updates and security patches.
- Certifications: UL/ETL, CE, RoHS, and battery safety approvals as appropriate.
Regulatory, environmental, and disposal guidance
- Recycle batteries and old devices according to local laws. Li‑ion cells must be taken to authorized e‑waste facilities; do not throw them in household trash.
- Follow local WEEE (Waste Electrical and Electronic Equipment) rules where applicable.
- Look for devices that minimize hazardous materials (RoHS compliance) and offer takeback or trade‑in programs.
Two short homeowner case studies
Case studies help illustrate how the recommendations apply in practice.
-
Case study 1: Fall prevention for older adults
- Situation: An older couple was experiencing nighttime disorientation on stairs and in the hallway.
- Solution: Installed wall‑mounted PIR units at 3.5 ft on every landing and inside the hallway with 40 lumens, 30s timeout and warm color temperature. Enabled canary firmware update policy and monthly checks.
- Result: Immediate reduction in stair trips and clear motion activation without blinding glare. Battery cycle health remained >85% after 18 months due to moderate settings and monthly monitoring.
-
Case study 2: Outdoor approach and privacy balancing
- Situation: Homeowner wanted porch lighting that activates for visitors without triggering due to street traffic or passing cars.
- Solution: Used IP65-rated hybrid PIR/radar flood light positioned to focus on walkway and steps, reduced sensitivity to ignore distant motion, and placed the device on an IoT VLAN with outbound access limited to the vendor's update servers.
- Result: Significant reduction in false activations and reliable approach lighting with preserved privacy and stable firmware updates.
Common myths — debunked
- 'Always leave devices plugged in for the longest battery life' — Not always true; continuous 100% state accelerates calendar aging unless the device has intelligent charge management.
- 'All firmware updates are risky' — While any update carries a small risk of regression, signed firmware and staged rollouts reduce practical risk and are essential for security fixes.
- 'Higher sensitivity is always better' — Too high sensitivity leads to false triggers, higher power draw, and annoyance. Sensitivity should serve the use case (pets vs people, short vs long range).
Cost vs value: total cost of ownership considerations
Initial device cost is only part of the equation. Consider:
- Expected battery life and replacement cost
- Firmware support lifespan (years of updates promised)
- Energy savings from LEDs vs baseline lighting
- Installation costs for professional mounting or wiring if required
Actionable checklist: install and maintain in 30 minutes a week
- Weekly 5‑minute: Quick check of stair and entry lights for responsiveness.
- Monthly 15‑minute: Check firmware versions, battery diagnostics, and run a deep walk‑through to test motion zones.
- Quarterly 30‑minute: Clean sensors, inspect mounts, and test any backup power or docking setups.
- Annually 1–2 hours: Audit all devices, confirm disposal/recycling of any replaced batteries, and update inventory records.
Final thoughts and next steps
Smart rechargeable night lights are a small investment with outsized benefits when deployed thoughtfully. The keys to success are considered placement, disciplined charging and storage habits, a structured firmware update approach, and sensible network security. By following the practical checklists and schedules above you will reduce false activations, extend battery life, protect privacy, and keep your home safe and welcoming at night.
Next steps
- Walk your home tonight and mark the top five priority locations for night lighting.
- Choose devices from the buying checklist and purchase one or two canaries for testing before a full rollout.
- Set a monthly calendar reminder labeled 'Night light firmware & battery check' and perform the first run‑through within 30 days.
- Create a simple inventory sheet with model, MAC, room, purchase date, and firmware version to maintain over time.
Follow these steps and your smart night lights will be secure, long‑lasting, and genuinely helpful — not just another blinking device on your network. If you want, tell me about your home layout and I can recommend specific placement maps and sensitivity settings tailored to your floor plan.
Leave a comment
All comments are moderated before being published.
This site is protected by hCaptcha and the hCaptcha Privacy Policy and Terms of Service apply.