

Introduction: The Quiet Value of Thoughtful Night Lighting
Nighttime navigation is a small, everyday challenge whose solution can have outsized benefits: improved safety, reduced sleep disruption, lower energy use, and a cleaner home aesthetic. Rechargeable smart night lights combine motion sensors, programmable color and brightness, and rechargeable batteries to meet these goals while preserving a minimalist look. This extended guide covers sensory mapping and placement strategies, the science of color and circadian rhythms, practical battery care, integration with smart home systems, step-by-step installation, advanced troubleshooting, and long-term maintenance.
How to read this guide
- Sections are organized so you can jump to what you need: quick setup, deep-dive on sleep-friendly light, battery care, smart features, and advanced troubleshooting.
- Actionable checklists and example configurations are included for apartments, homes with stairs, and shared households with pets or children.
- Recommended settings use conservative lux ranges and color temperatures to balance visibility and minimal circadian disruption.
Why prioritize rechargeable smart night lights
- Sustainability and cost: rechargeable systems reduce single-use battery waste and cut long-term replacement costs.
- Smarter behavior: motion activation and scheduling prevent unnecessary light exposure during sleep periods.
- Design and minimalism: compact lights and magnetic mounts let you hide hardware and maintain clean sightlines.
- Precision: selectable color temperatures and dimming preserve melatonin and improve comfort.
Nighttime navigation objectives and constraints
Define what success looks like for your setup, then design around constraints like layout, pets, and the presence of children.
- Objectives: safe foot placement, minimal disruption to sleep, low maintenance, and discreet hardware.
- Constraints: budget, wireless connectivity, presence of pets, irregular traffic patterns, and architectural features such as open staircases.
- Outcome metrics: number of nighttime trips with no additional overhead light, battery replacement frequency, and number of false triggers per night.
Motion-mapping fundamentals: map once, install smartly
Motion-mapping is the practice of mapping human movement and sensor fields to reduce the quantity of devices while maximizing coverage. Good motion-mapping reduces installation time and improves reliability.
- Create a path diagram: draw a simple floor plan showing primary nighttime routes and label chokepoints like stairs, thresholds, corners, and changes in level.
- Estimate traffic frequency: high-frequency pathways may need stronger sensors or overlapping coverage; seldom-used routes can rely on dimmer or longer-hold settings.
- Consider sightlines: line-of-sight sensors require unobstructed fields; radar-based sensors may penetrate certain obstructions but can be more sensitive to false triggers.
- Plan for redundancy only where safety matters: steps and stair edges should have overlap; corridors can often be handled with a single well-placed fixture.
Step-by-step motion-mapping exercise
- Walk your home at night with a phone flashlight and map each route you take in a typical week.
- Mark the points where you lose sight of the floor or where obstacles could cause trips or falls.
- Assign a priority score to each location: high for stairs and bathroom thresholds, medium for hallways, low for open rooms.
- Choose candidate mounting positions on the diagram: doorframe, adjacent wall, ceiling near entry, under a cabinet lip.
- Simulate sensor fields by holding your hand level at mounting height and rotating to estimate coverage and blind spots.
Sensor types, strengths, and weaknesses
- PIR sensors: detect changes in infrared energy. Best for obvious human movement, low power, often lower cost, but can miss slow or very small movements and are affected by ambient temperature.
- Microwave/radar sensors: emit waves and detect motion through doppler shift. Good for detecting slight movements and operate in varied temperatures, but more prone to false positives and may be regulated in some regions.
- Dual-tech sensors: combine PIR and radar to reduce false positives and improve detection accuracy. They provide better reliability at a higher cost and slightly higher energy use.
- Capacitive and ultrasonic sensors: less common in consumer night lights, useful for very short-range presence detection and specific niche applications.
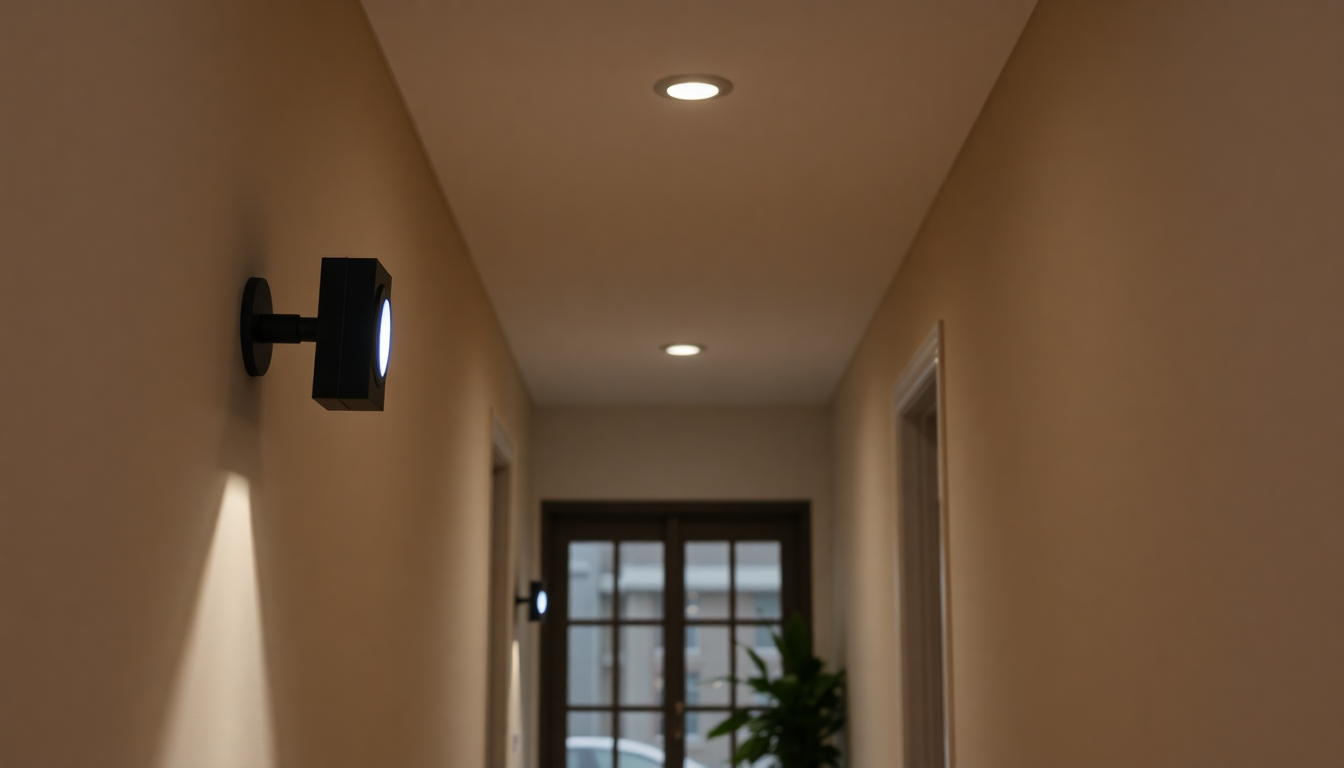
Mounting heights, angles, and practical tips
Small changes in mounting location can dramatically change sensor behavior.
- Hallways: mount sensors about 1 to 1.2 meters high and angle them slightly down along the path so the motion vector aligns with the walking direction.
- Stairs: mount above or to the side of the stair run, angled so the sensor views each tread; consider overlap at top and bottom landings for redundancy.
- Bathroom doors and thresholds: a low-mounted puck light near the floor can illuminate a path and reduce glare; pair with a motion sensor placed at eye level nearby or use an integrated unit.
- Corners and bend points: place sensors to catch a person as they change direction; sometimes a single higher-mounted sensor with a wide field of view is sufficient.
- Outdoor entryway transition zones: protect sensors from weather and place them sheltered, angled toward the approach path.
Minimalist placement principles revisited
- Path-first philosophy: light the path, not the room. Focus illumination on the walking plane and obstacles rather than uniform room lighting.
- Less-is-more: aim for fewer, strategically positioned devices rather than many redundant ones. This keeps the aesthetic clean.
- Conceal where possible: under-shelf strips, recessed coin fixtures, magnetic puck lights, and slim diffusers maintain a minimal silhouette.
- Functional camouflage: select finishes and small sizes that blend with trim color so hardware is intentionally unobtrusive.
Sleep-friendly color: how light spectrum and color temperature affect sleep
Light impacts circadian rhythms through the suppression of melatonin, a sleep-promoting hormone. Short-wavelength (blue) light has the strongest effect. For minimal interference, use warm, long-wavelength light during nocturnal activity.
- Color temperature basics: Kelvin values describe a light source's color. Lower K values (1800K to 2700K) appear warm and amber; higher values (4000K+) appear cool and blue-white.
- Recommended nighttime range: 1800K to 2700K provides visibility while minimizing blue light exposure. Amber or red modes are even gentler for sensitive sleepers and infants.
- Spectral considerations: two lights with the same Kelvin rating can differ in spectral power distribution. Products that advertise low blue content or specifically designed amber LEDs are preferable for minimal circadian impact.
- When to use red or amber: in the middle of the night, when you want to avoid waking yourself or someone else, switch to amber or deep-amber (around 1800K) or red. These preserve night vision and reduce melatonin suppression.
Brightness and lux guidelines for practical safety
Brightness is best measured in lux for surface illuminance. Most people don't have a lux meter, but smartphone apps or simple rules of thumb can help.
- Guideline ranges: 1-10 lux for general path illumination, 10-30 lux for stairs or near obstacles, and up to 50 lux for tasks that require reading or fine detail (avoid this at night).
- Measuring lux: use a lux meter app on your phone (calibration varies) or a dedicated handheld lux meter for accuracy. Measure at eye height and at floor level near the walking plane.
- Visual contrast matters more than absolute lux: directional light that creates contrast between edges, treads, and thresholds improves safety at lower lux levels.
- Ramping behavior: lights that gently ramp up are less likely to jolt a sleeper than lights that instantly jump to full brightness.
Rechargeable battery basics: types, behavior, and tradeoffs
Understanding battery chemistry and realistic expectations will help you prolong life and avoid surprises.
- Lithium-ion (Li-ion): common in rechargeable night lights for their energy density and lower self-discharge. Best for regular use; prefer devices with battery management and protection circuits.
- Lithium iron phosphate (LiFePO4): less common but safer and longer cycle life; heavier and slightly larger. Consider for high-cycle or high-temperature environments.
- NiMH rechargeable batteries: used less often in smart night lights but fine for removable cells. They have higher self-discharge and different charging behaviors than Li-ion.
- Removable vs non-removable packs: removable packs let you swap and maintain batteries over years; sealed units may be more compact but can limit long-term serviceability.
Detailed battery care and charging routines
- Prefer partial charging habit: maintain battery charge between 20% and 80% when possible to reduce stress on Li-ion cells. Overnight charging to 100% occasionally is acceptable, but avoid constant top-offs.
- Avoid deep discharge: do not allow batteries to sit fully depleted for extended periods. If storing lights long-term, leave them at around 40-60% charge in a cool place.
- Temperature matters: battery chemistry degrades faster at high temperatures. Keep charging and storage areas cool and out of direct sunlight.
- Use proper chargers: use the manufacturer-provided cable or a good-quality USB-C charger that supports stable voltage and current. Avoid cheap chargers with unstable output.
- Fast charging tradeoffs: fast charge is convenient but places more stress on cells and increases heat. Use it sparingly and prefer standard charging for routine top-ups.
- Battery lifecycle expectations: expect 300-1000 cycles for typical Li-ion cells; higher-quality cells or LiFePO4 can exceed this range. Track battery health via apps when supported.
How to choose charging hardware and ports
- USB-C is the universal recommendation: widely available, reversible connector, and supports adequate charging power for small devices.
- Magnetic docks: offer quick attachment and clean looks. Ensure magnetic contacts are rated for repeated cycles and that the docking alignment is secure to avoid intermittent charging.
- Wireless charging: convenient but less efficient and slower. Only choose if convenience outweighs charging efficiency and heat concerns.
- Replaceable battery modules: choose devices that let you replace battery packs if you want long-term serviceability without discarding the whole unit.
Smart features that truly matter
Not every smart feature is essential. Focus on capabilities that reduce maintenance and improve nighttime performance.
- Battery level reporting and alerts: prevents surprises by notifying you before a device dies in the middle of the night.
- Motion sensitivity and hold-time customization: lowers false triggers and lets lights turn off quickly after use to preserve battery and darkness.
- Color mode presets and scene integration: allow automatic switching to amber or red during specified hours.
- Mesh networking and device grouping: ensures coordinated behavior across a path so one motion event can light subsequent zones.
- Local control capability: products that function without cloud connectivity are more reliable and preserve privacy.
Home automation examples and simple routines
Examples below assume typical platforms like Home Assistant, Apple Home, Google Home, or Alexa. Use the platform you already use for consistency.
- Home Assistant automation example: when motion sensor in bedroom detects presence between 11pm and 6am, set hallway night lights to amber 20% and hold for 30 seconds. Group hallway lights together so motion in one triggers adjacent lights.
- Alexa routine example: at night, when motion is detected in the hallway, set night light to warm amber and trigger a speaker chime at low volume if multiple triggers occur in quick succession (useful for caregivers).
- Simple schedule: set lights to default off during daytime hours, enable amber-only mode between midnight and 6am, and allow manual override with a long-press or physical switch.
- Battery conservation routine: if battery falls below 20%, automatically reduce brightness and increase hold time slightly to avoid repeated wakes for charging.
Installation walkthrough: step-by-step
- Conduct the motion-mapping exercise and gather hardware, a measuring tape, a ladder, and a smartphone with a flashlight and a lux app if available.
- Mount temporary prototypes using tape or magnetic plates to test placement and angle for three nights before permanent installation.
- Finalize positions and mount permanently using screws, adhesive pads, or magnetic plates as supported by the product. Ensure secure mounting to avoid sagging over time.
- Connect devices to your mobile app and configure schedules, sensitivity, color temperature, and hold time. Enable battery reporting and firmware updates.
- Test during real nighttime conditions. Walk the path multiple times, test with moving at different speeds, and trigger pets to ensure pet immunity settings work.
- Fine-tune settings for sensitivity, ramping, and hold times over the following week. Small changes can yield large improvements in perceived convenience and battery life.
Example configurations for different home types
Use these as starting points, then tweak to suit personal preference and traffic patterns.
- Small apartment: one motion-mapped light at the entry of the hallway angled down, one low-level puck near bathroom door. Settings: amber 2000K, 3-6 lux, 20-second hold.
- Two-story home with stairs: light at top landing and another at bottom landing with overlapping fields. Settings: amber 2000K on stairs, 10-20 lux on treads, 30-40 second hold until you enter adjacent zone.
- Shared home with pets: higher-mounted sensors, pet-immune mode enabled, slightly longer hold to accommodate slower-moving people; reduce brightness to limit false triggers from animals near floor level.
- Nursery and baby-focused setup: low-level amber or red near changing area, motion only triggered by baby monitor integration or scheduled for expected awake times to avoid accidental brightening during short night feedings.
Cost, environmental impact, and payback
Consider lifetime cost, replacement cycles, and environmental footprint when choosing devices.
- Initial cost vs long-term savings: rechargeable units cost more upfront but reduce the recurring expense of disposable batteries and minimal electricity use due to low-power LEDs.
- Environmental footprint: rechargeable night lights reduce single-use battery waste. Choosing products with replaceable battery packs further extends device life and reduces electronic waste.
- Payback example: if a disposable battery costs the equivalent of 1.50 per month for replacements, a rechargeable solution may pay for itself within a year or two depending on usage and device cost.
Safety, certifications, and what to look for in specs
- Certifications: look for UL, CE, or equivalent electrical safety markings to ensure safe charging circuitry and protection against fire hazards.
- Battery safety features: overcharge protection, temperature monitoring, and short-circuit protection are important for sealed battery packs.
- Ingress protection: for outdoor or damp areas, check IP ratings. Bathrooms and covered porches need higher ingress protection.
- Manufacturer documentation: clear specifications for brightness in lumens or lux at specified distances, and explicit claims about low-blue or amber modes.
Common problems, diagnostics, and fixes
Many issues are solvable with simple adjustments or firmware updates.
- False triggers: lower sensitivity, enable dual-tech mode if available, raise mounting height, or mask part of the detection field with gaffer tape for testing.
- Inconsistent detection: recalibrate or replace batteries, check for strong heat sources that mimic human presence, and ensure the sensor is not blocked by doors, curtains, or furniture.
- Rapid battery drain: lower brightness or duty cycle, verify firmware is up-to-date, and confirm the device truly sleeps between activations. Avoid leaving the app constantly polling the device.
- Wi-Fi or pairing failures: place device near the base during setup, ensure 2.4GHz requirements are met if specified, and reset devices per manufacturer instructions before retrying pairing.
- Brightness too intense: reduce max brightness in the app, change color to amber, or shorten the ramp-up time. Test in complete darkness to find the lowest acceptable level for safety.
Troubleshooting matrix (quick reference)
- Problem: Sensor not triggering. Quick fixes: increase sensitivity, remount at different height, check battery level, update firmware.
- Problem: False triggers at night. Quick fixes: enable pet immunity, reduce sensitivity, mask detector edges, check for sources of interference.
- Problem: Short battery life. Quick fixes: reduce brightness, extend hold time to reduce total activations, check for firmware updates for power management.
- Problem: Lights stay on continuously. Quick fixes: reset the device, check scheduling rules and integrations, look for interference or misconfigured motion sensors.
Maintenance and long-term care
- Periodic testing: once a month, run through a quick test of each night light to ensure detection, charging, and firmware are all functioning.
- Firmware updates: enable automatic updates if you trust the vendor; otherwise, apply updates manually after checking release notes for battery or privacy-related changes.
- Battery replacement cadence: expect to replace or refurbish batteries when capacity drops noticeably — typically after several hundred cycles. Keep spare packs if removable.
- Cleaning: dust and grime can reduce sensor performance. Clean lenses and magnetic contacts gently with a dry cloth every few months.
Frequently asked questions
- Q: Will amber light really not affect sleep? A: Amber light has much less influence on melatonin than blue-rich light. While individual sensitivity varies, amber or red modes are the lowest-risk choices for nocturnal navigation.
- Q: Are rechargeable night lights safe left charging overnight? A: Follow manufacturer recommendations. Most modern devices include overcharge protection, but avoid leaving devices in high-temperature environments while charging.
- Q: Can I use these lights without Wi-Fi or cloud services? A: Yes. Many reputable models provide local-only modes or basic on-device controls. Local operation increases reliability and privacy.
- Q: How do I measure lux accurately? A: A dedicated lux meter provides the best accuracy. Phone apps can give rough estimates but vary by model and sensor calibration.
Shopping checklist: what to prioritize when buying
- Accurate battery reporting and reliable firmware support.
- Color modes down to 1800K or amber/red option and tunable brightness to low lux levels.
- PIR, radar, or dual-tech motion with adjustable sensitivity and masking options.
- Mounting options that match your aesthetic: magnetic plates, adhesive, recessed, or low-profile puck design.
- Replaceable battery packs or clear manufacturer policy on battery service.
- Safety certifications and good customer support reputation.
Putting it all together: a three-phase deployment plan
- Phase 1: Mapping and prototyping. Spend a weekend mapping routes and testing temporary placements. Use inexpensive prototypes if budget-constrained.
- Phase 2: Core installation. Install optimized units at high-priority locations (stairs, hallways, bathroom thresholds), configure sensitivity and color presets, and enable battery alerts.
- Phase 3: Refinement and expansion. After a few weeks of nightly use, review data (battery drain, false triggers) and fine-tune. Add additional units only when you identify genuine coverage gaps.
Real-world case studies and lessons learned
- Small family with toddler: swapping bright nightlights for amber puck lights near the changing area reduced nighttime awakenings and made diaper changes less disruptive. Motion-sensing and hold-setting avoided leaving lights on unnecessarily.
- Two-story household with pets: raising sensors to 1.2 meters and enabling pet-immune mode dramatically reduced false triggers. Overlapping lights at landings improved safety during midnight stair use.
- Elderly occupant in single-level home: emphasizing contrast on steps and thresholds at low lux levels improved confidence in night walking without requiring bright overhead lighting.
Final thoughts: minimalist, humane, and practical lighting
Optimizing nighttime navigation with rechargeable smart night lights is a small investment that pays back every night through safer movements, fewer sleep disruptions, and a cleaner aesthetic. The keys are deliberate motion-mapping, careful battery care, and selecting sleep-friendly color and brightness. Start small, prototype, and refine. With the right settings and a few good devices, you can achieve a low-impact night-light system that meets safety needs while respecting sleep and sustainability.
Actionable 10-point starter checklist
- Walk your home at night and map primary night routes and chokepoints.
- Choose lights with amber or red modes and accurate battery reporting.
- Prototype placements for three nights using temporary mounting.
- Set color to 1800–2700K and brightness to target 1–10 lux for most paths.
- For stairs, aim for 10–20 lux directed on treads with overlapping coverage at landings.
- Enable pet immunity and adjust sensitivity to match household occupants.
- Use USB-C or magnetic docks for convenient charging and keep a charging station near high-use areas.
- Enable firmware updates and set low-battery alerts in the app.
- Test and tweak over seven nights to finalize ramping, hold time, and sensitivity.
- Plan for long-term care: periodic cleaning, monthly checks, and battery replacement planning.
Further resources and reading
- Introductory materials on circadian lighting and color temperature.
- Consumer guides on battery care and safe charging practices.
- Smart home community threads for device-specific motion-mapping tips and automation recipes.
With intentional mapping, careful selection, and a modest routine for battery care, you can create a night-light system that keeps your home minimal, safe, and sleep-friendly. Start with the few highest-impact locations, refine settings over a week, and enjoy quieter, safer nights.

Leave a comment
All comments are moderated before being published.
This site is protected by hCaptcha and the hCaptcha Privacy Policy and Terms of Service apply.